Manni's Lightning Arrow Deadeye Build Guide (PoE Settlers of Kalguur 3.25)
Introduction
Bow characters received huge buffs in recent patches and became one of the best archetypes for both starting in a fresh league and efficiently farming endgame content.
 Lightning Arrow is an iconic Bow Skill, known for its satisfying clear and playstyle.
Crit-Based Bow builds like this one are historically known to be high-investment and high-reward, but the barrier to entry has been vastly decreased in recent patches.
This guide’s purpose is to guide you through the build as a League Starter or Low Budget Build. It should set you up nicely to explore the vast endgame of Path of Exile and to farm for the more expensive versions that are possible.
Build Overview
This section covers the general playstyle, strengths and weaknesses of the build to help you decide if it is the right build for you.
Playstyle
The build is simple to play, using two Active Skills ( Lightning Arrow and
  Artillery Ballista) and two Movement Skills (
 Blink Arrow and
  Flame Dash). No other hotkeys are required as we automate our other utility skills such as
  Mark On Hit Support +
  Sniper's Mark and
  Manaforged Arrows Support +
  Frenzy.
For the most part, we run through maps with high Movement Speed thanks to Gathering Winds while blowing up packs with Lightning Arrow. For tougher enemies, we summon a few Artillery Ballistas and continue firing Lightning Arrow at the enemy.
The high mobility and few active skills allow us to focus on positioning and dodging enemy mechanics. The build can be described as a classic glass cannon build, with our only defences being high Evasion and capped Spell Suppression. Even with taking the occasional deaths into account, this build generally progresses and farms faster than most other builds. If you dislike deaths and their experience penalty however, this is probably not the build for you.
Pros
- Great clear speed with high Movement Speed and solid single target damage makes the build very efficient for many lucrative strategies.
- Simple playstyle for relaxed grinding.
- Solid Allrounder – the build is decent for every type of content.
- League Start viability – one of the fastest builds to unlock the atlas with.
- Scalability – from league starter to multiple Mirrors worth of investment, there is always another upgrade to look forward to.
Cons
- Low Tankiness – even with solid gear, we are still weak to burst damage from a lot of bosses or beefed-up rares, so any mistake can result in dying.
- Bossing as a new player will require you to gain experience with boss mechanics, as our single target damage is not enough to trivialize bosses and most mechanics cannot be tanked through.
- Relatively gear-dependant – while the build works without trading for anything, it does suffer from being under-geared more than spell-based league-starters do, who can rely on gem levels for damage. Neglecting or getting unlucky on Bow loot and crafts can be punishing. This point can be mostly circumvented by minimal trading.
Build Concept
Elemental Damage and Trinity
The damage scaling of the build is mainly based on stacking flat Elemental Damage. We are gaining the majority of this scaling from added elemental damage modifiers on our Bow, however  Added Cold Damage Support and
  Herald of Ice are used to improve this damage, especially in the early stages when our Bow does not provide as much flat damage as an expensive endgame Bow. Additionally, prefixes on Rings, Amulets, and Quiver can provide additional sources of flat damage to push our damage output further.
Generally, we do not care which of the 3 types of Elemental Damage we deal because we avoid taking specific stats like “Lightning Damage” or “Fire Penetration” and prefer generic modifiers like “Elemental Damage”, “Projectile Damage” or “Elemental Penetration” to make sure the entirety of our damage is scaled.
In order to reap the benefits of  Trinity Support, we need to make sure our damage spread allows us to gain Resonance from attacking. Trinity builds Resonance stacks for the two elements that did NOT deal the highest damage on a hit and our goal is to build all three types of Resonance. Therefore we need our highest elemental type to vary between our hits. We achieve this by getting a decent amount of flat Lightning Damage on our build. Lightning Damage has a wide range of values in which it can randomly roll.
This will cause some of our hits to be dominated by Lightning Damage (when the lightning roll is high) and some hits will be dominated by Fire or Cold (because Lightning rolled a very low amount).
It is generally easy to achieve this as long as there is a solid Lightning Damage roll on our Bow.
Crit vs Precise Technique
While Crit is the way to go, Precise Technique is a very good alternative for the early stages of the build. Precise Technique allows us to ignore Crit early on, so we can focus on important damage and projectile passives first as well as having one less Bow suffix to worry about.
Pierce, Chain, and Return Mechanics
We need to modify our projectiles to hit multiple enemies to be able to deal with large crowds of enemies.
Our main options are Pierce, which makes our projectiles continue past an enemy to hit more enemies and Chain, which makes Projectiles seek out new nearby enemies after impact.
Chain is generally more powerful, but harder to acquire. For this build we chose Pierce because it only requires an investment of three passive points, while Chain would take up an Ascendancy node or a support gem. Pierce allows us to have more damage at the cost of clearing potential – a trade-off that is well worth it on a low budget. We can always go for Chain on a higher budget build, where its inherent ability to clear will outshine further investment into damage.
We never want to combine Pierce and Chain because then Pierce would have priority and Chain would almost never work.
Returning Projectiles is a very strong mechanic for Lightning Arrow because the returning projectiles can hit the same enemies that we already hit again, essentially acting as a multiplier to our total damage and doubling our Life gained on hit. The returning projectiles also fly past our character and can hit enemies behind us, increasing our clear coverage. Because of these reasons, we use the new  Returning Projectiles Support!
Far Shot
We utilize the Far Shot Ascendancy passive in our build, which scales our projectiles’ damage with their distance travelled, meaning we want to stay far away from enemies rather than going close. It also synergizes perfectly with the Long Shot passive and the Bow Mastery granting Crit Chance per distance travelled. Note that these mechanics use the actual distance travelled by the projectile from its point of origin and not from your character’s current position. This makes returning projectiles always have maximum effect of Far Shot since it includes all the initial distance travelled before the projectile started returning.
Defensive mechanics
High Evasion in combination with our fast clear and long range means we get hit by attacks very rarely. If we do get hit however, we are especially vulnerable to Physical Damage as we have nearly no Armour. Wind Dancer is a great tool to help us prevent getting killed in one hit. Since our build scales Evasion very well we should not undervalue the importance of Evasion rolls on our gear.
Capping Spell Suppression is extremely easy on this build and can be done entirely from the passive tree if needed. The Suppression Mastery that grants lucky Suppression Chance can grant us very solid Suppression Chance before we have all the passives required to cap out.
Additionally, the build sustains damage taken through Leech and a small amount of Life Gain on Hit from the passive tree, quickly refilling its life pool.
Build Progression
There are three main stages that we go through to efficiently reach our endgame build. The Path of Building all of them, so make sure to take notice of the different provided trees and gems.
- Rain of Arrows during the campaign (up to Level 65)
- Lightning Arrow with Precise Technique (non-Crit) (Level 65-85ish)
- Lightning Arrow Crit (Endgame build)
Rain of Arrows outclasses Lightning Arrow early on since it does not rely on extra projectiles or Pierce. Once we finish the Merciless Labyrinth and reach around level 65, we have a total of 4 extra arrows from the passive tree and Ascendancy tree as well as Pierce from the passive tree. We now switch to Lightning Arrow, not using Critical Strikes yet because we lack Crit-related gear and passive points.
The endgame version in this guide and the included PoB is around level 93 and the budget should be easily within what we looted on the way to level 93. At this point we should be flying through Tier 16 maps and can start farming whatever we desire. Of course there will be plenty of room for upgrades and improvements after that, but those are beyond the scope of this league-start-focused guide.
Path of Building, Passive Tree and Gem Links
Check the comprehensive Path of Building that includes a passive tree progression including over 10 passive trees, showing the progression step by step.
The Path of Building also includes a higher budget setup that I progress to after this guide.
For more details about the passive tree and Gem Links, there is a dedicated page with explanations and variations:
Ascendancy, Bandits & Pantheon
The Ascendancy, Bandits & Pantheon page shows and explains our choices for these aspects:
Gearing
We need at least one Spell Suppression, one high Accuracy roll, a bit of STR and INT on our gear and very importantly, enough Elemental Resistances to cap our Resistances. After that, we are looking to get as much Life, Evasion and Damage as possible.
Below is a short summary of which stats we try to get on each slot for our endgame version:
| Item Slot | Item Name |
| Bow | High Elemental DPS with a high base Crit Chance 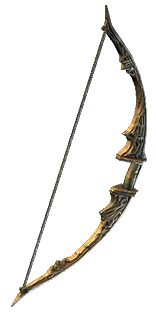 Spine Bow Spine Bow |
| Quiver | Rare with Life, Crit Multiplier, Projectile Speed, Flat Elemental Damage, Damage with Bow Skills |
| Chest | Rare with Evasion, Resistances, Suppression or  Hyrri's Ire Hyrri's Ire |
| Helmet | Rare with Life, Evasion, Accuracy, INT, Resistances or 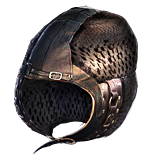 Rat's Nest Rat's Nest |
| Boots | Rare with Movement Speed, Life, Resistances, Suppression |
| Gloves | Rare with Life, Accuracy, Attack Speed, Suppression, Resistances |
| Amulet | Rare with Crit Multiplier, Life, INT, STR, Flat or %Elemental Damage or  Hyrri's Truth Hyrri's Truth |
| Rings | Rares with Life, Resistances, Flat or %Elemental Damage, INT, STR or  The Taming The Taming |
| Belt | Rare with Life, Resistances, %Elemental Damage |
Check out the dedicated Gearing Page for a detailed analysis of each gear slot, eldritch implicits, Flasks, Jewels and some unique item options.
Levelling
For the passive tree progression I recommend checking the different early game trees provided in the Path of Building . Below is a walkthrough for everything else you need to know to reach the endgame version of the build.
I included Twitch VODs of a Campaign Playthrough and Early Map Progression to level 85 from a test run I have done in preparation for the Trial of the Ancestors League.
Campaign
After Hillock, we use  Galvanic Arrow with
  Momentum Support to start progressing through Act 1.
During Act 1, our goal is to find items that have the proper sockets to use our gems, most notably a G-G-G 3-linked item. We also want two  Iron Ring and a
 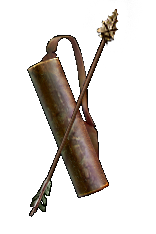 Serrated Arrow Quiver as early as possible to get a very significant damage boost.
After Tidal Island and Mud Flats, we buy a few gems and our setup looks like this:
 Galvanic Arrow +
  Mirage Archer Support +
 Momentum Support (or
  Added Cold Damage Support after level 8)
 Shrapnel Ballista +
  Pierce Support (+
  Faster Attacks Support at level 8)
 Sniper's Mark
 Dash and
  Blink Arrow (at level 10)
Make sure to cast Sniper’s Mark on tough enemies and don’t forget to summon and resummon ballistas during boss fights.
Note that Blink Arrow does not share a cooldown with the other Movement Skills, so we can use both in quick succession to move quickly through areas.
Upon reaching Merveil’s Lair and level 12 we can change Galvanic Arrow to
 Rain of Arrows +
  Mirage Archer Support +
  Added Cold Damage Support
and replace Dash with  Frostblink.
At level 16 we can add  Herald of Ice and a temporary
  Herald of Ash.
Once we get another G-G 2-link, we can start running  Frenzy +
  Manaforged Arrows Support to generate Frenzy Charges, which grant inherent bonuses to Damage and Attack Speed.
 Blood Rage is also an option to gain increased Attack Speed, but can easily be skipped if you do not want to deal with the life degeneration debuff that it applies.
At Level 24 we replace the Herald of Ash with either  Grace or
  Haste, depending on your preference and the level of comfort with your current survivability,
At this point, we should have the Precise Technique Keystone allocated which requires our Accuracy Rating to be higher than our Maximum Life. I strongly recommend regularly checking your Character Panel (Default Hotkey C) to check that this is in fact the case. Replacing Herald of Ice with  Precision is an option to fix our Accuracy, but is usually not necessary.
 Rain of Arrows +
  Mirage Archer Support +
  Added Cold Damage Support +
  Faster Attacks Support
 Artillery Ballista +
  Elemental Damage with Attacks Support +
  Elemental Focus Support +
  Added Cold Damage Support (replaced by
  Focused Ballista Support once you get it.)
At level 38 we add  Mark On Hit Support to
  Sniper's Mark to automate triggering it.
For the rest of the campaign we do not need any new gems and we just keep following the passive tree progression as outlined in the PoB. Always keep an eye on your Accuracy Rating to make sure it is higher than your Life total, enabling Precise Technique and its large boost to damage. Don’t neglect to identify any rare Bows and Quivers that you come across, and try to constantly upgrade them. If you cannot find a weapon upgrade for a long time, consider using an  Orb of Alchemy,
  Orb of Binding or an Essence on the highest level Bow base you can find.
There are many strong levelling uniques for this build, most notably  Storm Cloud which can work all the way up to level 50 or higher. On top of the usual levelling uniques that grant Movement Speed, most unique items that grant flat Elemental Damage are very good for us, for example
  Prismweave,
  Tasalio's Sign,
  Lioneye's Paws and
 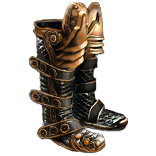 Wake of Destruction.
Transition from Rain of Arrows to Lightning Arrow
We aim to have 4 additional Arrows before we change to Lightning Arrow, so we can avoid using  Greater Multiple Projectiles Support, which would reduce our damage, and still have a sufficient amount of arrows to clear well. To achieve this, we need Master Fletcher and Multishot from the passive tree as well as Endless Munitions from the Deadeye Ascendancy which we pick up in Merciless Lab. We also require Piercing Shots for the necessary pierce. The PoB includes a passive tree for the swap to Lightning Arrow which requires around level 65 and all passive points from optional campaign quests.
Beating the Merciless Labyrinth at around level 65 to acquire our much-desired third Ascendancy might be the hardest part of levelling this build. I recommend delaying Act 10 Kitava until after this lab to avoid the -30% Resistance penalty that comes with defeating the last campaign boss. Make sure that your Resistances are capped, that you have at least 2,000 Life and consider running Grace over Haste for additional safety. Clearing a few additional Blood Aqueduct or Foothills instances to gain additional levels and gear before entering Merciless Lab is totally valid if you are not confident with the Izaro fight.
After the Merciless Labyrinth we now replace the Rain of Arrows gem setup with
 Lightning Arrow +
  Mirage Archer Support +
  Trinity Support +
  Returning Projectiles Support + (
 Added Cold Damage Support or
  Elemental Damage with Attacks Support if we already have a 5-link.)
Doublecheck that Trinity builds all three types of resonance when you repeatedly attack monsters with Lightning Arrow!
Progressing to the Endgame build
When we start mapping, we should have a solid Flask setup by now, such as: Divine Life Flask with bleed removal
 Divine Life Flask with freeze removal
 Jade Flask
 Quartz Flask
 Quicksilver Flask
We also aim to upgrade our Brine King Pantheon for freeze immunity as soon as we get our first  Divine Vessel
We aim to reach 100% Spell Suppression by the time we run red maps. The provided endgame tree in the PoB already reaches 90% Suppression from the passive tree alone, so a single good Suppression roll on any item will cap us. The more Suppression we can find on gear, the more passive points we can move to Damage or Life instead. On lower levels, before we have all Spell Suppression passives, the Spell Suppression Mastery that grants Chance to Suppress Spell Damage is Lucky” is a good alternative to capping at 100%.
The long-term goal is to transition away from Precise Technique into our Crit-based endgame build. For this swap to be worthwhile we will need:- a Bow with acceptable elemental DPS and Critical Strike Chance roll, preferably a
 Spine Bow base so that it can have over 7% base Crit Chance
 - a Diamond Flask that replaces one of the two previously suggested Life Flasks.
- Crit Multiplier rolls on our Amulet and/or Quiver.
- enough levels to allocate the required Crit passives and Masteries without having to drop crucial passives, usually level 80 or higher.
Once we have this checklist covered, we can transition into the endgame version that is part of the PoB. This includes respeccing around 10 passives, changing the Bow Mastery, removing Precise Technique, and adding  Power Charge On Critical Support to our
  Manaforged Arrows Support setup.
Additional tips and notes
Map Modifiers
There are a few map modifiers that give us trouble:- Elemental Reflect has to be rerolled.
- Physical Reflect is dangerous but is doable with the Yugul minor Pantheon.
- Cannot Leech – We have a small amount of Mana on hit that allows us to sustain Mana while clearing packs. On a single enemy, we rely on mana leech and are therefore in trouble with this map mod. Swapping in a Mana Flask for any of our Flasks will fix it.
- – 20% to the amount of suppressed spell damage prevented / Monsters have 50% increased Accuracy rating – this mod targets our only 2 defensive layers and is probably the scariest map mod for us. Runnable but very dangerous.
Bossing
Generally bossing is not one of the strengths of the builds but we are able to handle basic bosses like the Searing Exarch and the Eater of Worlds just fine. Here’s some advice for tough bosses if you find yourself struggling:- Replace the Quartz Flask with another
 Divine Life Flask. We do not need phasing in most boss fights.
 - Remember that we have Far Shot and Long Shot and benefit from being far away from bosses, losing damage when close.
- For some bosses, Evasion is relatively weak, like for Searing Exarch, the Shaper, the Uber Elder or the Maven. Changing
 Grace to
  Haste or
  Anger can make the fights easier.
 - If you are using any unique items that grant stats like Rampage or Magic Find, consider replacing them temporarily since those stats are largely useless in boss battles.
Troubleshooting
If you feel like something is wrong with your character and it is underperforming, please consider the following list of commonly found issues and suggestions to address them:
Problem: “My damage feels lacking.”
Common solutions:
- Run a map and check if you are building up all three colours of Resonance for Trinity. Check the section about Trinity if the Resonance is not building up.
- Check your Accuracy Rating and Chance to Hit in the character panel (Default Hotkey C). If you are playing the Crit-Version already, you should aim to have at least 3300 Accuracy Rating for Tier 16 maps. If you are still playing the Precise Technique version of the build, your Accuracy Rating must be a bigger number than your maximum Life
- Make sure you keep summoning Artillery Ballistas during the battle if they expire or get destroyed. The ballistas are a big portion of our boss damage and some encounters with AoE damage can destroy the ballistas pretty fast, so make sure to keep an eye on the ballista counter in the top left corner of the screen and resummon them if necessary
- Assuming you are already in the Crit stage of the build, check your Critical Strike Chance and Critical Strike Multiplier, ideally in PoB with correct configuration or at least in the character panel (Default Hotkey C) ingame (make sure to choose the Lightning Arrow skill). If your Crit chance (including buffs like Power Charges and Diamond Flask) is lower than 60-70%, you should consider acquiring a Bow with a better base Crit Chance or test
 Increased Critical Strikes Support. If your Crit Chance is solid (70%+), your Crit Multiplier should not be below 300% (or 450% if you are using Crit Damage support). Your Amulet, Quiver, Jewels, and Eldritch Ember implicit on Body Armour are easy sources of Crit Multiplier.
 - If none of these applies, gear quality is likely lacking. Usually, the biggest damage upgrades are a better Bow, more links and gear with more damage affixes (without compromising Life and Resistances). Check the gearing section to see what to look out for.
Problem: “I die a lot.”
Common solutions:
- Double-check your Elemental Resistances and Suppression values. For red maps, I recommend being either capped on Suppression or at least being at 80%+ with the Mastery that grants “Chance to Suppress Spell Damage is lucky”.
- Make sure you have a Flask against bleeding and Corrupted Blood and don’t forget to use it when necessary – look out for debuffs showing up in the top left corner of your screen.
- Make sure to either have a decent amount of Chaos Resistance on gear (enough to reach a positive value on the character panel) or at least acquire Poison Immunity from the Armour and Evasion Mastery on the Graceful Assault passive skill Notable.
- Make sure you have protection against freeze and chill, either with a Flask suffix or an upgraded “100% chance to avoid being frozen” from the Brine King Pantheon.
- Does your character have adequate Maximum Life and Evasion rolls? For Tier 16 Maps I recommend at least 4,000 Life and 25,000 Evasion Rating (during Flask effects) on your character to feel safe.
- Use your high mobility to avoid melee hits from dangerous bosses or rares (especially Essence, Harvest, Expedition or similarly strong enemies). We are using Far Shot and want to be far away from enemies if possible
Closing Notes
Please keep in mind that everything in here is a guideline, and don’t be afraid to adapt the build to fit your play style or the drops you get. The guide does not cover the near endless possibilities to customize and optimize your build in the deep endgame of Path of Exile. The purpose of this guide is to help you reach and explore the endgame on a fun character! If you have any questions, ideas or suggestions, don’t hesitate to ask on my discord or Twitch Stream, where I stream almost daily.


