GhazzyTV's Holy Relic Guardian Build Guide (PoE Settlers of Kalguur 3.25)
Introduction
Holy Relics used to be a fan favorite build with little exploding orbs orbiting the player as we ran around hitting things while the relic granted us and the rest of our minions a minor life regeneration effect.
One problem of the skill was always getting its cooldown low enough to make them trigger as often as we’d like.
With the introduction of  Summon Holy Relic of Conviction that is no longer a problem, however. We also get +1 to our maximum number of holy relics, which is amazing.
Balormage wrote up a version of the build on Necromancer, which goes poison and scales a bit differently.
You can find his guide here: “Balormage Holy Relic
For gameplay footage you can check out the video below, do keep in mind that the video guide might be out of date so to make sure you have the latest updated version of the build keep reading the written guide here.
With 3.25 we are once again having mana problems, and the best available simply solution to this is to add a +2 mana gained on hit jewel in place of a Ghastly eye. These are typically dirt cheap, and only need this one modifier. Getting resistances and/or Life here would be beneficial.
Build Overview
In this section, I will outline the pros, cons, & the general play style. This will allow you to determine if the build is for you or not!
Pros
+ Low Requirements – The build requires very few items to function well, and all of these are relatively cheap. As such it functions well on low investment.
+ Unique Play Style – Unlike most summoner builds, this provides you with a different way of playing the game and in my opinion is more than welcome in order to avoid doing the same thing every league.
Cons
– *Transfigured Gems*- As the build requires 2 Transfigured gems, you must either purchase these or farm them yourself in Merciless Labyrinth.
– Trigger Math – As the holy relics need cooldown reduction in order to trigger as often as we’d like, and they trigger off of our attacks, it will require some math to make it function optimally.
– Damage Halts – In super low budget, you might encounter bosses with heavy AoE damage, and this could cause problems with minion survivability. As long as you follow the PoB it should be more than fine.
Playstyle
The playstyle of this build is very different from your average minion build. We fire hundreds of projectiles courtesy of  Lancing Steel of Spraying and this projectile vomit will trigger our
  Summon Holy Relic of Conviction that then deals damage in a large area around them.
Damage Scaling And Defensive Layers
Damage scaling in this build happens entirely through making  Summon Holy Relic of Conviction trigger as often as possible. We make them deal damage through a combination of
  Triad Grip to convert them to cold, and Guardians small relics to get all three elemental auras for “free”.
Similar to a CoC build there is a bit of trigger-math involved here. We want to hit either the 52% or the 82% breakpoint for the relic. The stages between these are wasted stats.
It’s important to note that if you have a cooldown reduction number between 52 and 82% you’re not bricking your build, you’re just “wasting” stats as these do not achieve anything.
Fortunately thanks to  Lancing Steel of Spraying providing an absolutely unethical amount of projectiles, we don’t really have to math out attack speed at all. More is simply better. It also comes with the neat side benefit of providing us with more Life Gain on Hit as we hit more.
Defensively we make use of block chance to reduce incoming damage, armour to reduce physical damage taken, RF chad to transfer 20% of the damage we take to him effectively reducing incoming damage by 20% and life recovery from spamming lancing steels.
Important PoB Notes
All my guides use Path of Building. We have a simple guide for you that shows how to import my build into Path of Building, you can find the guide here
End Game PoB & Passive Skill Tree
Holy Relic Low Budget PoB
This is the low budget PoB where things are kept very simple. You can find the PoB here: https://pobb.in/kJOPE9Nprocl
Holy Relic Medium Budget PoB
When you reach yellow maps and have gathered some currency you should slowly start transitioning into Medium Budget. You can find the PoB here https://pobb.in/gp0yhiLRj_si
Holy Relic High Budget
The High Budget version of the Holy Relic where things are still kept relatively sensible. You can find the PoB here: https://pobb.in/quIsT1evp6kk
Gearing
You can find more information on the dedicated page and in the gear progression, but there’s a brief TLDR below.
| Item Slot | Item Name | Rarity |
|---|---|---|
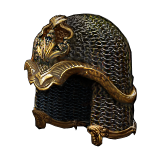
| Head |  Geofri's Crest Geofri's Crest |
Unique |
| Amulet | Life, resistances but most importantly attributes | Rare |
| Chest | Choice of Corrupted Rare chest or a  Dialla's Malefaction Dialla's Malefaction |
Unique or Rare |
| Gloves | 3-green 1-Red socket  Triad Grip Triad Grip |
Unique |
| Boots | Rare Boots | Rare |
| Belt |  Darkness Enthroned Darkness Enthroned |
Unique |
| Rings | 1x  Unset Ring Unset Ring |
Unique |
| Rings | 1X  Bone Ring Bone Ring |
Rare |
| Weapon |  Cutlass or other high APM low dex sword Cutlass or other high APM low dex sword |
Rare |
| Shield | Minion shield | Rare |
Ascendancy, Bandits & Pantheon Recommendations
You can read about the recommended Ascendancy, Bandit choice, and Pantheon Power recommendations for this build on our dedicated page.
Leveling
Since this build requires 2 transfigured gems the goal is to get them and if you decide to run this build as your very first character the following leveling process works wonders:
 Rolling Magma is the initial skill you’d want to run, this is combined with any supports that scales the damage such as
  Added Lightning Damage Support or
  Added Cold Damage Support you can also use
  Arcane Surge Support. This is then used till you get both
  Summon Raging Spirit but won’t use it till you get either
  Infernal Legion Support or
  Melee Splash Support to allow the minions to deal damage to multiple enemies at the same time and combine this with
  Minion Damage Support of course. This means that your main source of damage from level 8 will be your Raging Spirits in either an item with 3x blue sockets or 2x blue and 1x red socket linked together.
The utility skills to look for at this early stage of the campaign would be  Frostblink and
  Frost Bomb to speed up your progression. Aura wise it’s always comfortable to use
  Clarity this early as well to help sustain the mana cost.
At the end of Act 1 you’ll encounter the act-boss Merveil, make sure you have at least 1x  Sapphire Ring, 2 is preferable but 1 will be enough to make the fight significantly easier. At this point you’ll be level 12 or higher allowing you to switch your main damage output skill to
  Absolution which should be linked with the added damage skills cold (green socket) or lightning (blue socket) and of course the minion damage still. This becomes your entire playstyle all the way till you get yourself the needed items to play this build;
  Summon Holy Relic of Conviction and
  Lancing Steel of Spraying which both are farmable in the Merciless Labyrinth!
Some small notes during the campaign to keep track of is that when you pick up the passive skill-tree notable “Sacrifice” you are able to start using  Raise Zombie and link them with
  Minion Life Support, in Act 3 you can do the Library quest which gives access to
  Feeding Frenzy Support which boosts the damage output of all your minions. Aura wise you can get
  Summon Skitterbots for added damage efficiency from Act 2 and in Act 3 you’ll want to do the first Labyrinth and take the Radiant Crusade. This bad boy will literally carry you all the way to yellow tier maps with little to no effort!
Questions?
To guarantee that my guides are tools you can utilize to enhance your experience in Path of Exile, you may have questions. Please join the PoE Vault discord and they will attend to them as soon as possible.
Final Notes
As much as I love making build guides, it is very crucial in a game like Path of Exile that you play the game the way you enjoy playing it. With that said, if you’ve made any tweaks to the build compared to what I’m showing in this guide I would love if you’d posted it in my discord! It’s an effective way to show other approaches and it helps me grow as a build guide creator!
I hope you found the build guide useful and I wish you all many  Divine Orb drops!


